Pipeline CRM integrates with Elementor forms. The goal is to automate lead capturing from the website and send lead data directly to Pipeline CRM to eliminate the manual work and create an efficient system that saves time and resources.
A Quick Overview:
Streamlined lead management: By integrating the Elementor form with Pipeline CRM, you can automate the process of capturing and managing leads. The form submissions are seamlessly transferred to Pipeline CRM, ensuring that no lead information is lost or overlooked. Workflow automation: With Zapier acting as the bridge between the Elementor form and Pipeline CRM, you can leverage its automation capabilities to perform additional actions. For example, you can set up notifications, send confirmation emails to leads, or trigger other workflows based on specific conditions or events.
1. Sign up for accounts:
Create an account on Pipeline CRM (if you haven’t already).
Ensure you have access to a WordPress website with Elementor installed.
2. Set up the Elementor form:
Open your WordPress website’s admin panel.
Navigate to the page where you want to add the Elementor form.
Edit the page with Elementor.
Drag and drop the Form widget onto the page.
Configure the form fields according to your requirements.
Save the changes.
Check out a quick video on how to add Elementor form on the page and set up form fields
3. Create a new Zap in Zapier:
Log in to your Zapier account.
Click on the “Make a Zap!” button.
Choose “Webhooks by Zapier” (requires Zapier paid plan) trigger.
Select the “Catch Hook” trigger event and click Continue.
Copy your webhook URL.
Go to your Elementor form, select the form, and click on “Actions After Submit”.
Click on the “+” icon and select “Webhook” from the dropdown.
You’ll notice a new “Webhook” tab, click on it and paste Webhook URL which you copied earlier from Zapier.
Save all changes by publishing the page.
4. Test Form Submission and Data Capture:
Go to your published page, where you have the Elementor form.
Fill out and submit the form.
Now go to your Zap setup wizard and check if the data came through.
5. Connect your PipelineCRM Account & Map Fields
For the action in Zapier, please select Pipeline CRM.
In the event field, select “Create Person” and then click “Continue.”
Authenticate your account and enable Pipeline API:
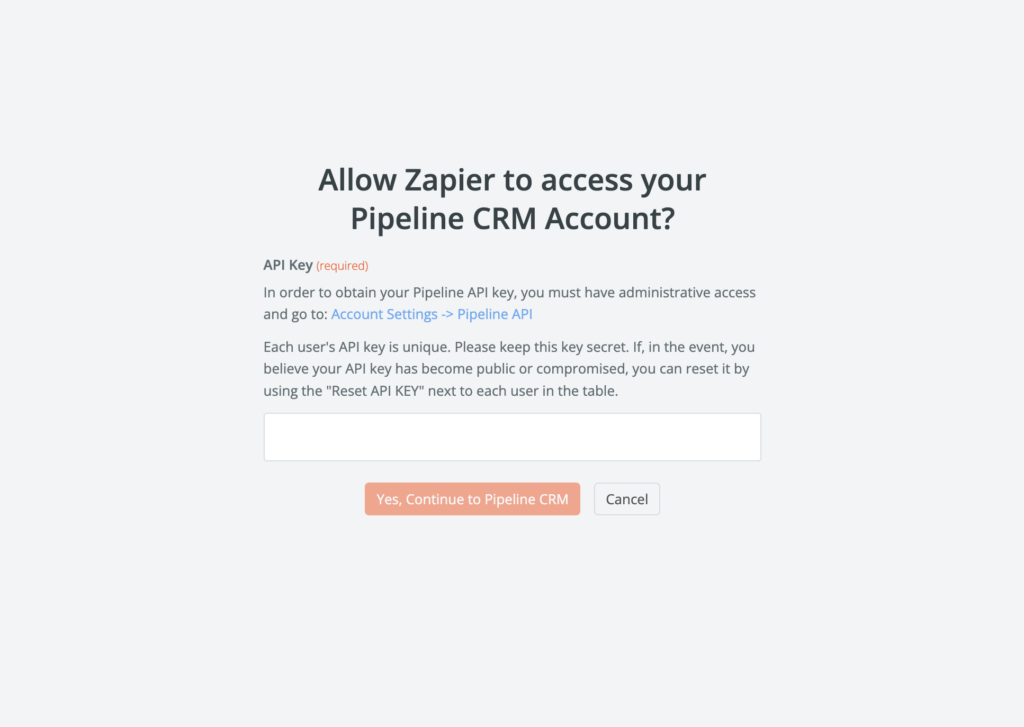
Go to your Pipeline CRM account settings, click the API Integrations tab, and select “API keys.”
Copy and paste your API key into “Connect an Account | Zapier” window (Screenshot below) and click on “Yes, Continue to Pipeline CRM”
For the action in Zapier, please select Pipeline CRM.
Go back to your Zapier wizard and click on “Continue.”
Now is the fun part! You need to map fields from your form to Pipeline CRM fields. E.g., the “First Name” from your form should be mapped to the “First Name” field in your CRM account (please watch the screen recording to see the exact fields mapping process).
6. Test your Zap & and Check Your CRM for a New Lead
For the action in Zapier, please select Pipeline CRM.
Go back to your Zapier wizard and click on “Continue.”
Now is the fun part! You need to map fields from your form to Pipeline CRM fields. E.g., the “First Name” from your form should be mapped to the “First Name” field in your CRM account (please watch the screen recording to see the exact fields mapping process).
If everything looks good, then publish your zap and give it a descriptive name like “Leads from Elementor Form to Pipeline CRM.”
6. You did it!
With successful automation of lead capturing from your website form, your sales team can now shift their focus to what truly matters – nurturing leads and driving sales growth. By streamlining the process of capturing leads automatically, you have eliminated the manual work and created an efficient system that saves time and resources.